Tag Archives: review

Taotronics SoundSurge 90 Headphone Review

Welcome to this Taotronics SoundSurge 90 headphone review. Below we will run through the main pros and cons of these budget noise cancelling headphones. I’ve been using these for a few months now so thought I’d share my experiences.

One huge plus i discovered when I opened the box, is that the SoundSurge 90s come with a hard travel case. This is hugely useful when traveling and it offers good protection to the headphones when not in use. Most other budget headphones typically only come with a soft pouch so in my opinion this is a huge advantage of the 90s as to buy a similar case is likely to cost in the region of ~£10.

SoundSurge 90 Build Quality & Comfort

The build quality of these headphones seems to punch well above their price. They have a reassuringly solid feel and fold away neatly when not in use. Only time will tell but i’m confident that if they are looked after they will last well.

In terms of comfort I have no complaints. I can where these for several hours at a time and not suffer any aches or pains. The ear cups are soft and snug without being overly tight.

Active Noise Cancelling (ANC) Performance

The Active Noise cancelling (ANC) is the main reason I bought these headphones. This is what makes these headphones really superb for the money. I’m not a hardcore audiophile but the sound quality appears superb to me. While i’m working from home I tend to listen to ambient music (like this)  to help me concentrate. With the SoundSurge’s on, the sounds of my screaming ferrel young children downstairs are completely nullified. It’s like they no longer exist!

Taotronics SoundSurge 90 Headphone Review

The ANC is so good it actually removes the sound of my typing away on my keyboard. I found this a bit strange at first but soon got used to it. The building site next door can no longer be heard.

With all of these sounds gone while i’m working my ability to concentrate has increased massively. These headphones really are a game changer for my work productivity.

Another nice feature not seen on earlier versions of headphones from Taotronics is that the ANC turns off when you turn the headphones off. This greatly reduces the risk of you forgetting to turn the ANC off and draining your battery in between periods of use.

Battery Runtime is very good. I use them for between 2-5hrs a day and typically only have to charge them once per week.

I have not measured the battery life but based on my usage to date I have no reason to doubt the claim of 35hrs (with only Bluetooth on) or 30hrs music playback (with Bluetooth & ANC on). The headphones charge quickly too. A quick 5 minute charge will give you roughly 2 hours of playback which is great if you get caught out with low battery charge.

Usability

The headphones are pretty easy to operate once you’ve used them a few times. Pairing seems to work seamlessly with my phone or laptop.

It is worth remembering that if you have paired them with say your phone and you want to then pair them with your laptop you’ll first need to disconnect them from your phone. To do this simply hold the on/off button along with the down volume for a few seconds until you see a purple light. Then simply pair the headphones using the bluetooth connection settings on your laptop/phone as normal.

Charging is done via a Micro USB port. It is slightly annoying that they do not include USB-C charging on this model however the better sound quality makes these the ones to go for in my opinion.

CSoundSurge 90 Conclusion

Hopefully this Taotronics SoundSurge 90 headphone review has been useful. If so please help support the channel by using our Amazon affiliate link to purchase these headphones.

If you are in the market for a cheap set of noise cancelling headphones I would thoroughly recommend these. They aren’t going to give you studio quality hi fidelity sounds. However they will give you great ANC performance and decent sound quality that will satisfy most users needs for the fraction of the cost.

In fact I like them so much i’m just about to buy another set for my wife because she keeps borrowing mine. If you want a pair you can pick them up on Amazon here.

Alpkit Qark Head Torch Review

I’ve been using the Alpkit Qark head torch for just over a year now so feel like i’ve given it plenty of time to show me its strengths and weaknesses. In this review I’ll give you my honest opinion about it’s strengths and weaknesses.

What I Use the Qark Head Torch For

Before you read my opinion about this torch you should probably understand what I use it for.

I bought the Qark primarily for night time running. Initially this was on my daily commute to the train station. I live in the UK countryside and run on a mixture of footpaths, bridleways, tracks and country lanes/B roads. Some of it is through woods, some across fields and some on the road. This means all of my running (even the road section) is unlit so when it is dark it is really dark. The terrain I typically run on isn’t  the roughest you’ll find in the UK. However it is certainly varies with much of it is off road and some section a mix of stones, mud, rutted grassland etc.

Alpkit Qark Head Torch Review

Why Did I buy the Qark?

The main reasons I bought the Qark were:

  1. The ability to use both the rechargeable battery that comes with it as well as swap that out for AAA batteries as a backup. Much of my use is on part of my work commute so a backup battery solution for when i forgot to charge it was required. The most i run in a days is 2 x 12km runs which the battery can easily handle.
  2.  Alpkit quote a max brightness of 580 lumens. Given none of my running is on lit roads/paths this was a big factor in my choice.

So Is it Any Good?

Battery life has so far been great. After a year of use several times a week I have yet to run out of power mid run. As a result I haven’t had to resort to using the AAA backup batteries I faithfully carry around during my commutes. I’ve seen no major degradation int he battery over the year so no complaints on the battery front.

The brightness is fantastic. There are 5 modes (3 white and two red) to choose from. I always use the white and typically the middle one is bright enough when running off road. If conditions are particularly bad I sometimes switch it on full power.

One feature that has proved fantastic that I didn’t give much thought before buying it is the ability to change the ‘focus’ of the light beam. You can simply twist the ring around the bulb when running to alter the beams direction/size. You can adjust it to shine a brighter spot further away or to give a slightly less bright but much wider field of light. This is very useful when the terrain you are running on changes.

My initial impression when I opened the packaging was ‘wow, it’s a bit big maybe I should have got something smaller’. After a year of use I can honestly say it is incredibly comfortable and the size has never bothered me. The head band keeps the torch snug to my scalp so I barely notice it is there once i’m running.

Post run the head torch gets left by the back door where I charge it. As a result it also gets used regularly for taking the bins out, popping to the post box after dark or even used during a power cut. As a result it gets knocked about a bit and has been dropped several times. So far I’ve had no issues with reliability or build quality.

Alkit Qark Head Torch Review Summary

Would I buy it again? Certainly. It is incredibly powerful making night running on cloudy moonless nights off  road very easy. The battery services all my needs and gives me the backup of AAA batteries should I every need it. It’s comfortable and waterproof so can withstand a good soaking in the rain. Alpkit offer a 3 year guarantee on the Qark which shows they.  have faith in the build quality.


Addidas Galaxy Trail Shoes Review

Over the last year or so I’ve transitioned off the road and I am no doing most of my running on the fields, footpaths and bridleways near where we live. At the tail end of last winter I was often struggling for grip on the muddy trails so started looking at replacing my road running shoes with some trail shoes.

I’m not a natural runner. Despite having completed a couple of marathons (slowly) I tend to pick up a lot of injuries when running. My normal pattern is to start running regularly, get competitive with myself and up either the mileage or speed too soon and pick up an injury after a few months. Then I don’t run for 6 months before i begin the cycle again.

In the past gait analysis has shown that I over pronate so I’ve tended to end up buying expensive running shoes with lots of cushioning and arch support, supplemented with orthotics for extra support.

Having read the excellent book Born to Run I started to think more about my persistent running injuries and whether the expensive, highly supportive running shoes I have been using all these years were helping at all. I thought maybe I should try and use an all purpose running shoe with less support…

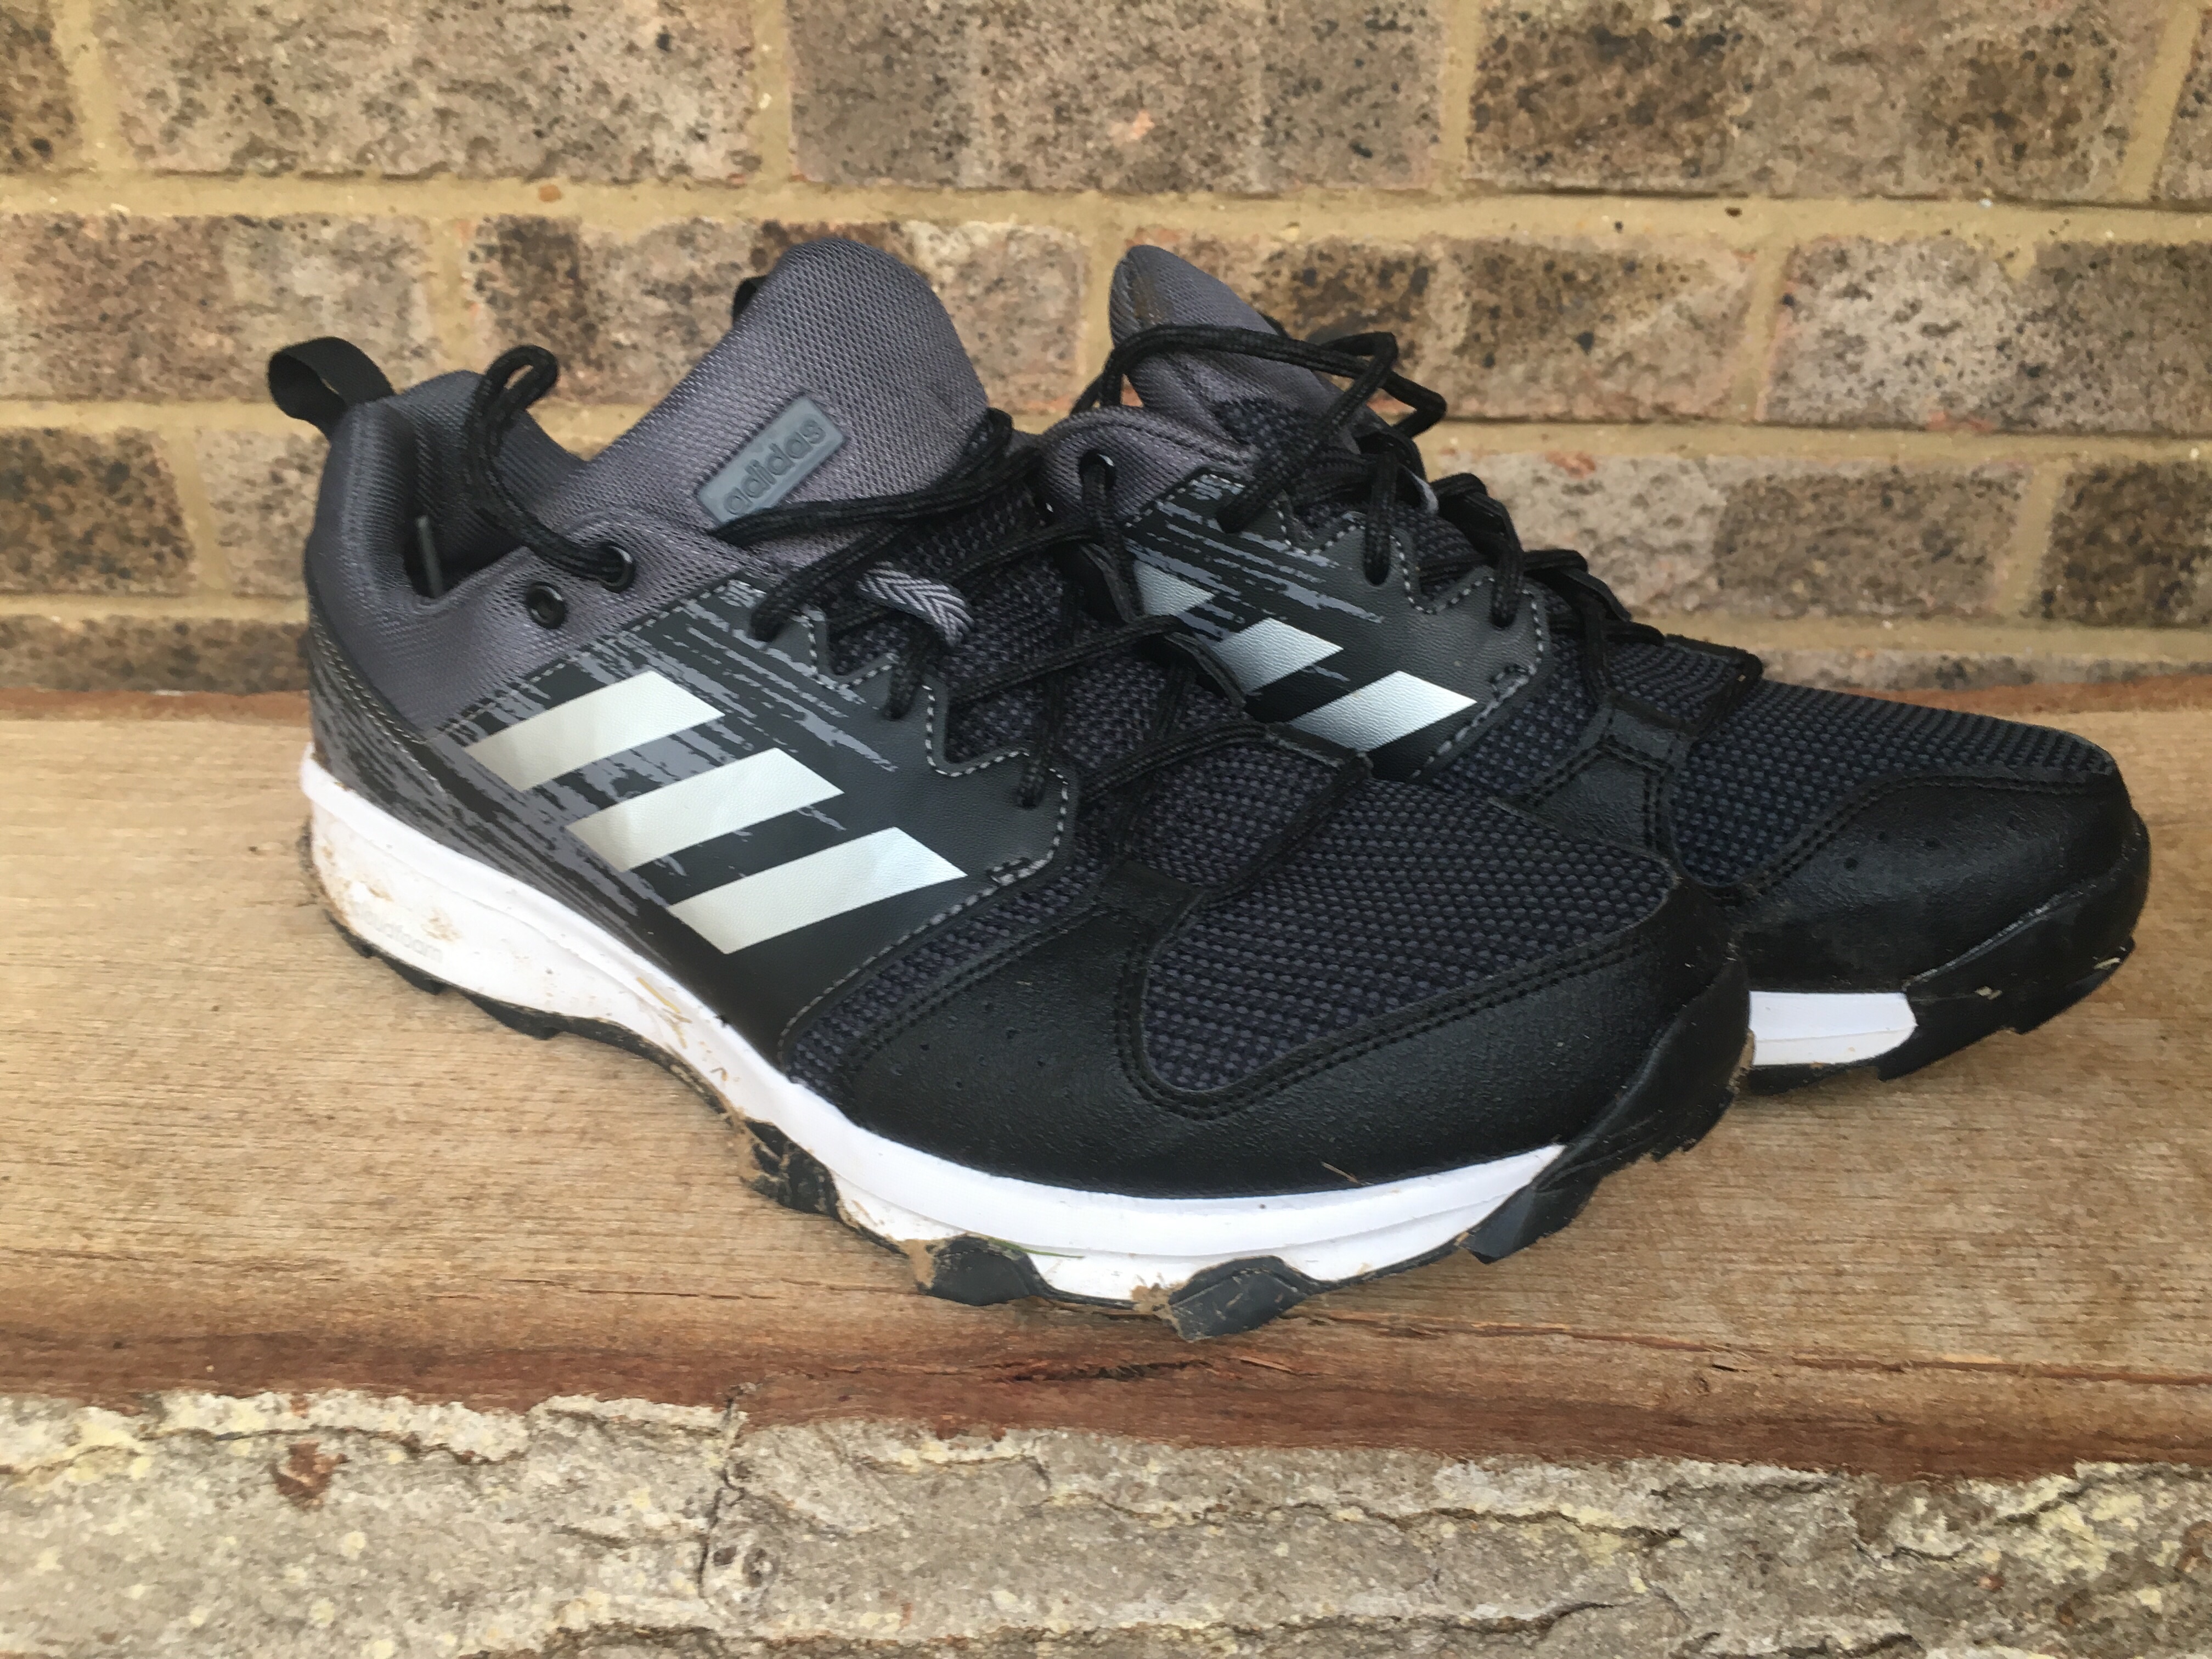
The above thinking lead me to buying a pair of Adidas Galaxy Trail Running Shoes. They were cheap (£25 in a sale), looked pretty inoffensive and reasonably light.

The thing I like about these shoes compared to my usual road running shoes is you feel more in contact with the ground. I assume due to the thinner sole I can feel every little undulation in the ground. When I’m running off road this seems to give me more confidence that I am less likely to turn an ankle. I feel more in tune with the uneven surfaces I am running on.


The lower levels of support/cushioning also makes these running shoes seem lighter than my previous road shoes. Psychologically these makes me feel like I can run faster and I am lighter on my feet. They feel nice to run in.

Not only are the Galaxy’s good to run in but the styling is pretty inoffensive too. This means I can wear them when on holiday when out an about and sill have some running shoes with me when I want to nip out for an evening run.

Due to the reduced amount of support these shoes offer I’ve taken my time building up the mileage I run in them. The theory being it will give my muscles and tendons time to adapt to them and avoid injuries. So far so good. I’ve been wearing them for a few months now and I’ve yet to suffer any injuries.

All in all these shoes cost less than 1/4 of the cost of my road running shoes. The quality seems great and there are no signs of wear yet. They fee great to run in and look nice. I’ll certainly be buying them again next time i need some new runners.

Ascaso Dream User Review & Tips

The Ascaso Dream is one of the best looking home espresso machines out there. With it’s retro styling and solid build it is a good blend of style and functionality. In this post I’ll write about my experiences with the Ascaso, sharing a few tips and provide as honest review of the device as possible.

Feel free to ask any questions or leave your own tips at the bottom of this post.

Using the Ascaso Dream

The manual I got with my espresso machine was not really that clear – the translation from Spanish (where the machine is produced) is a bit hit and miss. After some research online and some experimentation here are the procedures I follow to pull a shot of espresso:

1. Switch on the machine (ideally 30 minutes prior to pulling the shot)

2. Run a little water through the empty filter to warm the pipes

3. Load the filter with coffee

4. Turn on the coffee switch for 25 seconds exactly

It is generally excepted that 25 seconds is the perfect time to brew an espresso, which is generally accepted as being 1 fluid oz (30 ml) in volume. As a general rule you’ll need about 8-10grams of coffee for a single shot.

Of course all machines (even of the same model) are different so you’ll have to experiment with different beans, grinds and amounts until you find what works with your particular setup.

Ascaso Dream Review

The first thing you’ll notice about the Ascaso is it’s great build quality. The aluminum casing feel solid and strong compared to many other consumer level espresso machines that are often cased in plastic.

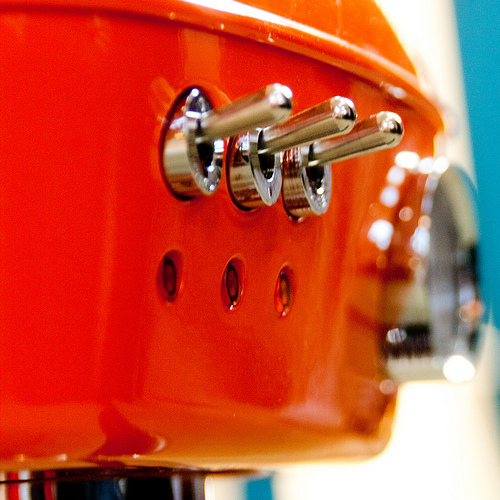
The styling hasn’t been neglected in favour of build quality and alongside the Francis Francis this if probably the most stylish espresso machine out there with it’s retro look and curved lines. I particularly like the metal switches…

Ascaso Dream Review

Ascaso Dream Review

image by maybe missions

The machine is easy to use and comes with just the core features (no pointless bells and whistles) required to pull good quality espresso and make good cappuccinos.

After switching on the Dream is ready to go after about 1.5 minutes, though it’s best t give it 15 minutes to warm up if possible. The pump provides 16 bar of pressure, more than adequate to pull a good espresso with every grind you can throw at it.

The steam wand works very well and after a little practice i was able to produce good micro foam. I’m not yet able to do latte art but now i have a tool that will enable me to try…

Here’s a great video review I found from Seattle Coffee Gear which is worth a look:

Priming the Ascaso Dream

This is the process of filling the boiler . Heating up an empty boiler can seriously damage your machine so it is an important procedure to do. Ideally you should prime your espresso machine….

  • After using the machines steam function
  • If the machine has not been used for some time
  • If you’ve just refilled the water reservoir

Here is the procedure I use to prime my Ascaso Dream espresso machine:

1. Turn on the machine
2. Turn the steam tap on
3. Turn on the coffee switch
4. Allow water to run from steam wand for 5 seconds)
5. Turn off the coffee switch
6. Turn the steam tap off

Ascaso Dream Tips

  • If possible always switch the machine on 30 minutes before use in order to warm not just the boiler but parts like the portafilter
  • After pulling a shot of espresso run a little water through in order to clean the pipe from the boiler to filter
  • If possible use mineral or filtered water at all times. This will reduce the build up up of minerals, reducing the need to descale as regularly
  • Always descale the machine a minimum of quarterly, more regularly if you use it multiple times per day

Ascaso Dream Espresso Machine

Ascaso Dream Espresso Machine

image by zikje

Getting Hotter Espresso from the Dream Machine

Sometimes I’ve noticed that the espresso produced by the Ascaso is not as hot as I’d like. After doing a bit of research it seems this can be a fairly common problem with the Dream machine.

The main reason is that the boilers cycle operates between a set range. This means it heats the water to a pre-determined temperature then shuts down and the water is allowed to cool until it reaches a lower limit before it kicks in again. If you’re pulling a shot in between you’ll probably get a slightly cooler shot than the machine is capable of.

The first thing to do to get a hotter shot is to listen to the boiler. When you switch on the machine, or if you’ve left it on for a while (aim for 30 minutes) you should hear the boiler click on. Listen carefully and after a short time you’ll hear the boiler click off when the temperature reaches the thermostat’s higher limit. Try pulling a shot straight away and you should get improved results.

I saw another great tip on the excellent website coffee geek to try and get the boiler a bit hotter. Again wait for the boiler to switch off (when the water is at it’s hottest) then flick on the steam switch for a few seconds. This will add quite a bit of extra heat to the boiler which will enable the Ascaso to produce a much hotter shot. You may need to play around with the amount of time you put the steam switch on for as you may find the water is too hot.

How to Descale an Espresso Machine

Descaling an espresso machine is essential in order to keep it in great shape. I use Dezcal, a detergent free, citric acid based descaler, commonly available over the internet. If your machine has light use aim to do this at least every 3 months, more if you use your machine regularly or live in an area with soft water.

When descaling your machine always start with a cold machine. In total allow about 90 minutes to thoroughly descale the machine. Here are the exact steps i follow:

1. Fill the water reservoir 3/4 full of warm water  (this helps dissolve the descaler faster)

2. Empty the descaler into  the water reservoir and stir until fully dissolved

3. Switch on the machine

4. Turn on the coffee switch and run about 1/4 of a cup of water through the filter

5. Open up the steam knob, allowing 1/4 of a cup of water to run through the steam wand too

6. Turn off the coffee switch then switch off the machine and close the steam knob

7. You have now replaced the water in the boiler and pipes with the descaler water

8. Allow to sit for 20 minutes

9. Repeat the above process twice more until the water reservoir is almost empty.

10. Remove the water reservoir, rinse out and fill with clean water

11. Proceed to run the whole reservoir through both the filter and steam wand as before to clean the tank.

12. Refill the reservoir with water and repeat to ensure all of the descaler is removed from the boiler and pipes.

As you run water through the filter and steam wand while cleaning it is normal to see a bit of sludge and deposits come through into the cup. This is normal and shows the descaler is working well. Assuming you descale regularly you shouldn’t see any big deposits get flushed out.

If the machine has not been descaled regularly descaling might dislodge larger bits of scale which can occasionally block pipes when flushing through. If this does happen you may need to take the machine apart to try and find the blockage or take it to a repair center. In the [unlikely] scenario that this does happen don’t keep running the machine if it appears blocked as this can damage the pump.

Ascaso Dream Summary

Advantages

  • Great consistent crema
  • Ease of Use
  • Retro design
  • Full metal casing
  • Basic temperature gauge

Disadvantages

  • Not always hot espresso (see above workaround)
  • Temperature gauge is not very accurate/appropriately scaled
  • Supplied instructions are poorly translated to English!
  • Cost – it’s not the cheapest on the market!

All in all I am very pleased with the Ascaso Dream. It looks great in the kitchen (so the wife likes it!) and produces consistently good espresso. As with all espresso machines it takes a while to ‘learn’ your machine and perfect the results you get out. If you not interested in this element then you’re probably best off buying an automatic machine like a Nespresso.

If however you are interesting in becoming a home barista and learning to pull good espresso then I’d definitely recommend the Ascaso Dream.

Olympus XA2 Review

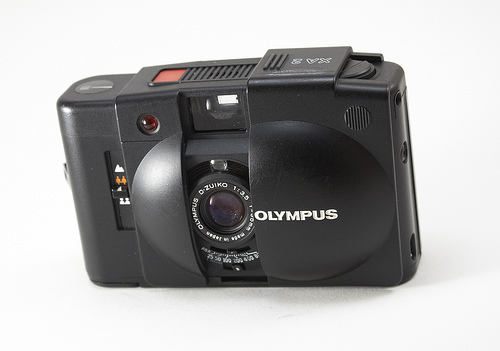
When it was first produced in the 1980’s this 35mm zone focusing compact was a technological and design breakthrough. It’s selenium light meter and clam shell design were cutting edge at the time of release and the Zuiko 35mm f3.5 was (and still is) super sharp.

Olympus XA2
Olympus XA2

After using a DSLR in quite heavily for the last year or so it has taken quite a while to get used to using such a supposedly ‘low tech’ camera. There are really only a couple of things you can do wrong when using this camera.

Once the XA2 is loaded with film you first need to select the correct ASA, something i’ve failed to do on a c0uple of occasions. You simply move the little switch under the lense to the ASA setting that matches the speed of the film you are using (available options are ASA 25, 50, 100, 200, 400 & 800).

Before taking a shot the only thing you need to worry about is setting the correct zone focus. On the front of the camera there is a switch with 3 symbols, one for each of the focus zones:

Two Heads: 1.2m – 1.8m

Two Orange Bodies: 1.2 – 6.3m

Mountains: 6.3m – infinity

Every time you reopen the clam shell to take a shot the XA2 resets back to it’s default medium zone (the two orange bodies) so be sure to change zone before shooting if your subject is close by or in the distance. Initially this can be easy to forget and the first couple of roll of film i put through the XA2 contained numerous out of focus shots.

The Olympus XA2 works by using a selenium light meter which is incredibly sensitive. When shooting you will hear two clicks: one when the shutter opens, another when it closes . You need to keep the camera perfectly still until you hear that second click, particularly if shooting in low light.

Shooting film has been a bit of a revelation for me after shooting digital for so long. I like the idea of being forced to think much harder about my shots before pressing the shutter release button. As a result I think shooting film has helped me improve as a photographer.

Cross Processed XA2 Shot

The above shot was taken using colour slide film which was then cross processed as regular negative film. The results of doing this are unpredictable, high contrast colours that can offer up some really nice surprises.

The metal body and clam shell design means that most of these cameras tend to be in great condition despite being getting on for 30 years old. The most common repair you’ll need to make (i’ve just had to do this on mine) is to replace the light seals. You’ll know you need to do this if some of your pictures have a orange/yellow line across them. This is a simple job, simply buy some replacement light seals from ebay (they only cost a couple of pounds/dollars), scrape away the gunky foam from inside and fit the new seals.

The great thing about these cameras is that they offer all of the benefits of the much more expensive Lomo LCA while doing so at bargain prices. These cameras often turn up in thrift stores or junk sales but also sell at reasonable prices on ebay. If you see one for a reasonable price, just but it.