Category Archives: Gardening

Return of the Bougainvillea

A few weeks ago I posted about our rather unhappy bougainvillea. After suffering from multiple aphid infestations and the cold nights in our conservatory it had dropped all of it’s leaves and I feared the worst.

Bougainvillea Buds

Bougainvillea Care in Winter

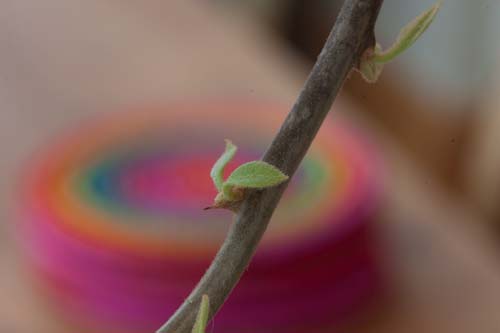
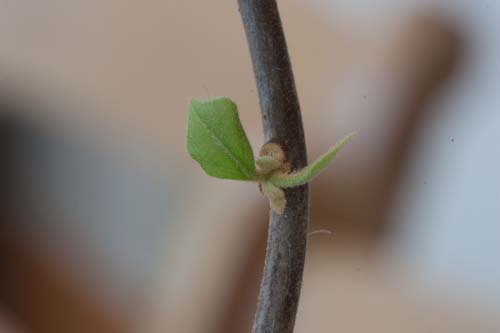
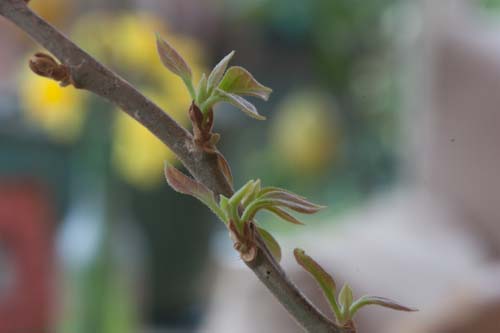
Bougainvillea Sprouting

Well as you can see I’m please to report that it is now on the road to recovery. All i did was give it a couple of good sprays to deal with the aphids and move it into our living room which has a much warmer temperatuure over night. It’s been happily sat infront of the patio doors, next to a radiator so it’s been gettign plenty of heat and light.

Fingers crossed she’ll be back to her magnificent best soon now that the worst of the winter is [hopefully] out of the way. It’s always satisfying when you manage to revive a plant that appears to be on deaths door…it’s amazing the difference a few degrees can make.

Spring is here!

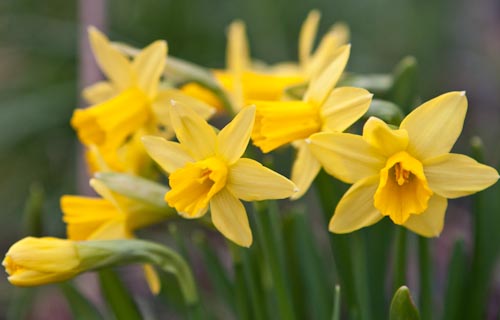
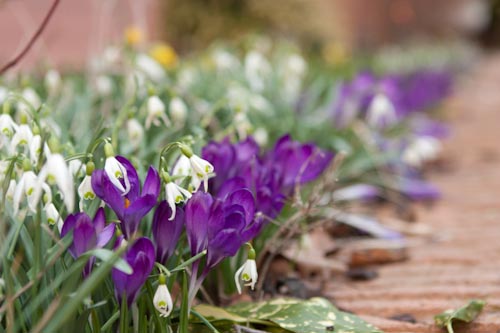
It didn’t take long. Spring is well and truly here and the garden is suddenly a riot of colour. The daffs, snow drops and crocuses are in full bloom and it seems like winter is a distant memory.

Mini Dafodils

Crocuses & Snowdrops

That sais as I write this it is trying to snow outside despite being quite mild this morning. Its the time of year when you need to keep an eye out on the weather forecast for those late frosts and try not to get too carried away and plant too many seeds to early….

An Unhappy Bougainvillea

Last summer we bought a small bougainvillea from the local garden center. My wife loves these plants and was forever reminding me every time we saw them while away on holiday. In the last couple of years I kept noticing them in garden centers and debated whether they’d survive the winter here i the UK.

After buying it we kept it in our south facing conservatory and it didn’t seem to do too well. After a few weeks it stopped flowering and was looking rather unhappy. After upping the watering considerably and feeding once a week it burst back into flower and kept going all summer right through until about early November.

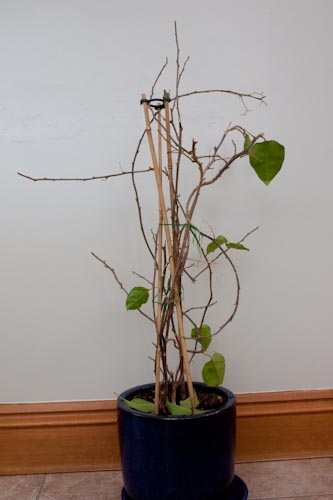
Recently it has been looking more and more unhappy. Not only has it been infected with aphids (which i’ve sprayed) but it has recently dropped all of it’s leaves. As you can see below it looks more than a little sorry for itself.

Bougainvillea Leaf Drop

Bougainvillea Leaf Drop

I suspect the leaf drop is as a result of the very cold temperatures we’ve been having. Night time temperatures in the conservatory have been falling to about 10 degrees Celsius so I’ve decided to move it back into the living room where the temperatures are a bit warmer.

After doing a bit of research here’s the general advice I’ve found for looking after bougainvillea plants:

  • They like being pot bound
  • Don’t feed if overly dry roots, water first
  • Feed once a week
  • Give as much sun as possible
  • Keep in frost free environment during winter

I also read that bougainvilleas can drop their leaves in temperatures under 10 degrees. Hopefully with a little TLC I can revive this plant and get it back to it’s best in the Spring.

Planting a Bare Root Rose in Frozen Ground

After recently choosing and buying a bare root rose for our walled garden I was a bit dismayed when six inches of snow and freezing temperatures arrived a few days after I got the new rose planted in the ground.

When researching how best to plant bare root roses all of the advice I read said not to plant them in frozen ground. As temperatures began to plummet last week (they reached a low of -13 degrees Celsius) I soon began to get worried about the effect of the ground freezing around the roots so soon after I planted it.

One evening I got my thinking cap on and decided I needed to somehow protect the rose from the impending night time frost. This is what I came up with…

Planting a Bare Root Rose in Frozen Ground

Planting a Bare Root Rose in Frozen Ground

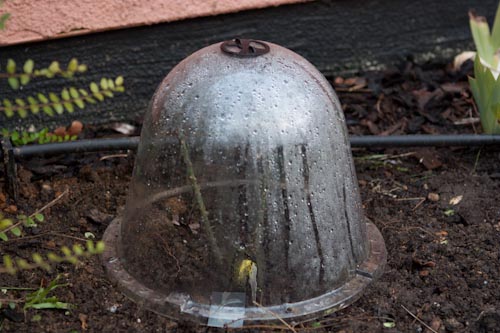
The solution I came up with was to place a small plastic cloche over the rose in order to keep the snow and frost off the plants but to also hopefully keep some of the heat in the soil and prevent the root ball from freezing.

Fingers crossed this will have been enough to keep the plant alive and that I got it in place before the roots were frozen into the ground. The soil underneath feels soft still so hopefully I got there just in time.

Taking Christmas Cactus Cuttings

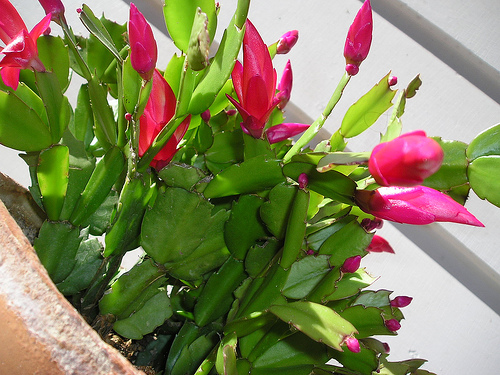
Christmas cacti are relatively simple to take cuttings from. Simply twist off or cut 2/3 segment pieces of a healthy plant. Pot the cuttings around the edge of a large pot filled with potting compost and sharp sand or vermiculite. 3/4 of the bottom segment should be buried below the compost.

If possible try to take your cutting 1 segment below a V or split. This will mean your new plant already has two stems from which to sprout new growth which should help speed up the plants initial growth.

As will all cuttings it’s best not to water them but instead to mist the foliage regularly in order to stop them from drying out. After a few weeks you should notice some new segments forming.

Christmas Cactus Cuttings

Christmas Cactus in Flower

Your cuttings will almost certainly wilt and flop over after a few days. Stick with it and keep misting and keep them in plenty of light. Hopefully after a few days the shock will pass and they’ll get down t sprouting roots.

Some people dip the segments in rooting powder or gel prior to planting however I don’t bother. Other people recommend leaving the cuttings in the open air prior to cutting in order for them to heal over, again I have never felt the need to do this.

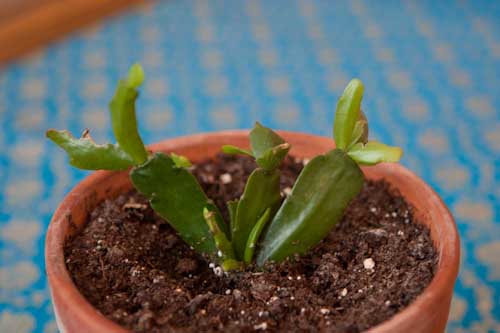
Christmas Cactus  - A few weeks later
Above is a cactus that came from a cutting back in September. It’s growth has been pretty slow, mainly due to me taking the cuttings at the end of the summer. Despite this you can see there are plenty of new shoots forming and hopefully i’ll have a nice healthy cactus by the time Christmas comes round.

Planting Bare Root Roses

Bare root roses are becoming increasingly popular. In this post we’ll discuss the benefits of bare root roses over potted varieties as well as proving some easy to follow instructions telling you how to plant them.

Below is the what a bare root rose looks like just after it arrived in the post.
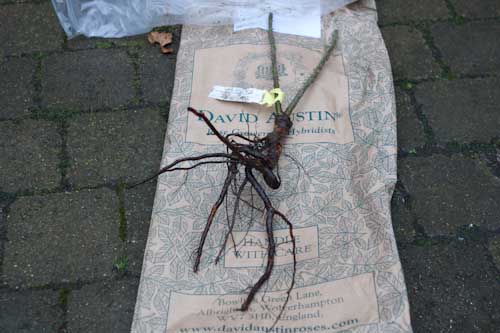
Bare Root Rose

Why Choose a Bare Root Rose?

Below are a few of the reasons I chose a bare root rose over a pot grown variety.

1. Variety. First of all by buying a bare root rose via the internet/post there is a much much bigger variety to choose from than if i went round my local nurseries. By buying a bare root online i was able to research all the varieties and order exactly the type I wanted.

2. Early Growth. Bare root roses are usually available in mid winter when the plants are dormant. By planting during this dormant period you allow the roots time to establish before the foliage growing season begins in the Spring. Consequently you get more first year growth from a bare root plant compared to a potted variety.

3. Cost. Because specialist growers can post bare root plants they can sell to a wider audience via mail order and the internet. As a result they can grow more plants, stock more varieties and sell each plant for less, all great news for the consumer.

How to Plant a Bare Root Rose

Pre soak. With bare root roses it is essential that the roots do not dry out prior to planting. As soon as you receive them soak the roots in a bucket of water, ideally over night

Location. First of all ensure that you’re planting your rose in an appropriate position. Some prefer more sun than other while some varieties are vulnerable top mildew so planting should be in the open to improve airflow.

Hole. Dig a nice big hole 12 to 18 inches deep and wide. If you planting against a wall ensure the hole is 6″ from the wall so as not to cramp the roots.

Soil Preparation. Roses are quite hungry feeders so make sure your soil is rich by adding well rotted compost. It is also a good idea to  add a root growth powder (usually fungal based) like Mycorrhizal Fungi which add certain bacteria to the roots that promote vigorous growth. Apply such powders once the roots are in the hole allowing some of the powder to cover the roots as well as the surrounding soil, just like in the photo below.
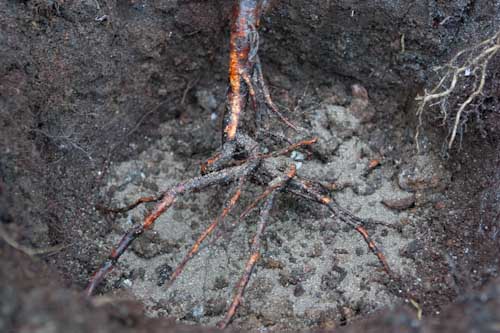
Bare Root Rose Rooting Powder

Bare Root Rose Rooting Powder

Planting. Spread out the roots so they are flat to the bottom of the hole. This will provide the plant stability. The plant should be deep enough so that the bud union is just below the soil line. If planting against a wall it is a good idea to angle the stems slightly toward the wall to help training. Firm in the soil well.
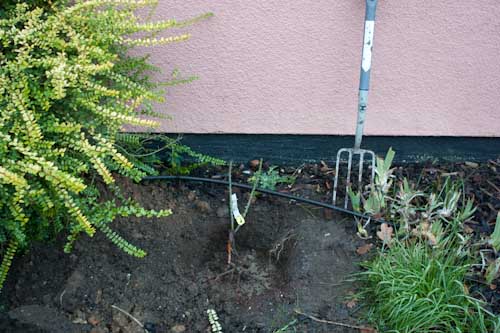
How to Plant a Bare Root Rose

Water and Mulch. Once planted be sure to water heavily, at least a couple of full watering cans. If the soil sinks with all the water then add some more. To help retain moisture around the plant build a small mound of mulch (compost or leaf mold) a couple of inches high.

After Care. Keep an eye on the weather and water if required. Keeping the roots moist really is crucial in the early growth stages until the roots are more established. You shouldn’t need to start feeding your rose until foliage starts to form in the Spring.

Varieties

You’ll soon realize there are hundreds of varieties to choose from when you start researching bare root roses. Be sure to take the time to research which rose is best for you. You’ll need to consider the following things when choosing a variety:

  • Amount of sun exposure of site
  • Growth space
  • Colour
  • Scent
  • Flowering: Once v Repeating
  • Disease resistance
  • Flower shape

The variety I am planting in this post is a Gertude Jekyll climber from the highly recommended David Austin Roses. It is a repeating flowerer so should bloom all summer long with a good fragrance. It’s reasonably disease resistant and vigorous in growth. More importantly it provides bright pink flowers which is the only colour my wife will entertain!
Pruning Espalier Apple Trees

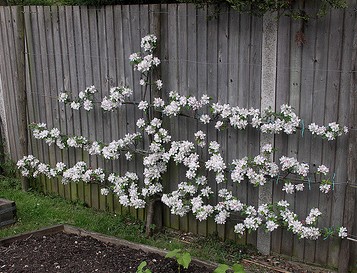
Growing Espalier fruit trees is not only a great way of growing the likes of apples and pears in a confined space but also a way to add attractive plants to your garden. A flowering espalier will make an otherwise boring wall or fence look stunning. Once initially trained espaliers don’t require much care – a quick prune once or maybe twice a year.

When to Prune an Espalier Apple Trees

Most pruning should be done in the middle of winter when the tree is dormant. Anytime between January and March should be fine. On established plants you may need to do some light pruning in late summer in order to help maximize your fruit harvest (more on this below).

Pruning To Train Espaliers

The main purpose of pruning an espalier in the frost 3-4 years of growth is to shape the tree by creating the horizontal leaders/tiers to both create an attractive tree as well as maximizing future yields of fruit.

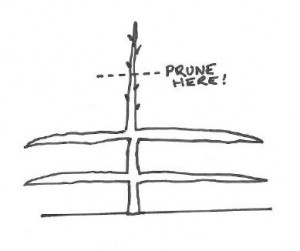
Unfortunately there are  no short cuts and you’ll most likely be able to gain one tier of horizontals each year. Each year you’ll need to trim back the vertical leader (main stem) in order to encourage new side shoots that will form the next horizontal layer.

Pruning an Espalier Apple Tree

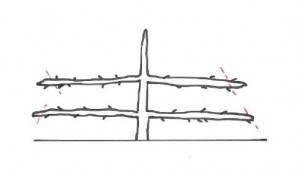
In order to do this prune the vertical leader just above 3 buds. One bud will be the next vertical leader while the other two will hopefully form the next horizontals (one left, one right). Pruning the main vertical leader hard in the winter encourages vigorous growth just below the cut.

Allow the 3 buds to grow throughout the summer and when big enough tie them in position. With the new branches that will form the new tier you may struggle to tie them horizontal at first as their tendency will be to grow upwards. If this is the case you may have to tie them at a diagonal angle first until they are long enough and flexible enough to be bent horizontal.

Depending on the width of your espalier you may want to encourage your horizontal leader to put on growth. To do this simply prune them just after a downward facing bud.

Pruning Espalier Tiers

The downward facing bud will grow out over the next summer to be a continuation of the horizontal tier.

Allowing an Espalier to Flower/Fruit

During this initial training phase some people prefer to remove any blossom the tree puts on in early summer. This ensure that all of the plants growth goes into producing strong leaders and roots rather than producing fruit. Whether you do this is up to you and depends how patient you are!

If allowed to set fruit, young apple trees tend to not fruit too well in the first few years. While the tree is still growing yields can be poor as energy is diverted towards root and foliage growth. Any fruit that does get produced is often bitter tasting and taken by pests. As a result many growers feel it is better to remove flowers from an espalier until the tree is virtually at it’s intended size and shape.

Espalier Apple Tree

Pruning Established Espaliers

Once your espalier is trained yearly pruning should be a relatively simple and quick process.

First you’ll need to prune back the side shoots from your horizontal tiers. Cut these back to 3 leaves from the basal cluster. Prune back growth from previously pruned side shoots to one leaf.

On more mature plants you may need to thin out the buds to prevent the trees spur system becoming too congested. This should be done between January and March.

Fig Tree Care

Position – Fig trees are Mediterranean plants so choose a really well sheltered spot in the garden. Ideally somewhere near a wall that will absorb the sun’s heat during the day and radiate it at night.

Type of pots – Fig trees grow quickly. Left unchecked their roots will spread resulting in huge trees with masses of foliage and not much ripe fruit. In order to get the best crops, restrict root growth by growing in pots. Pot up each year up to a maximum size of a half barrel. Don’t worry too much about your fig tree getting root bound.

March – Time to pot on your fig tree. Aim to pot on to a pot between 5-10cm larger each year. A soil compost such as John Innes No.3 is ideal and always pot your tree 4cm deeper than it was before. Water well once repotted. Assuming the plant has more than one stem, pinch out the growing tips to help divert strength to the roots. Even if you are not potting on you should remove the plant from the pot and cut off about 25% of the rootball every 2-3 years before repotting with fresh compost.

Late March is the time pruning. Cut out any dead wood and thin the branches to allow air and light to circulate around the plant.

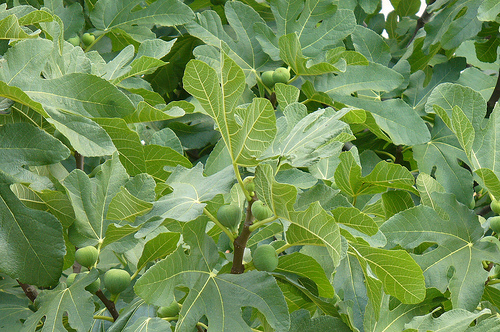
fig tree careimage by fsse8info

April – Start to feed your fig trees with a high potash feed – a liquid tomato feed is ideal. Once a week will normally suffice.

June – By now growth should be rampant. Pinch out the growing tip of your fig tree after about 5 leaves

September – In late September remove any fruit smaller than a pea. These won’t ripen and will divert  energy away from foliage growth and ultimately next years crop.

December – If pot grown move your fig tree inside to avoid the harsh frosts. A garden shed or cold greenhouse is ideal. Once the tree has gone dormant light isn’t really required. Just ensure you keep the soil moist but not too wet.

Radishes are first up

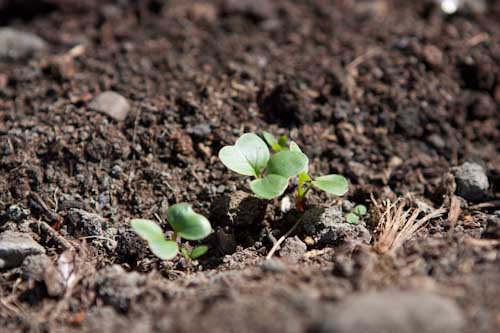
I sowed the first of this years vegetable seeds two weeks ago outside in the raised beds. I sowed spinach, radish, beetroot and carrots (along with lots of onion sets).

Radish Seedlings

Radish Seedlings

The radishes are first up thanks to the great weather we’ve been having over the last couple of weeks. I just need to remember to keep watering the beds through this warm spell to avoid the seedlings getting frazzled!

Radishes are great vegetables t grow for new gardeners as they tend to put up with most conditions, can be sown directly in the ground and grow very quickly so are great for getting a quick crop from empty parts of the vegetable plot.

Tips For Growing Basil

I have found basil to be a fickle plant to grow. If the conditions are right it grows like a weed and rewards you with vigorous growth but if the conditions are slightly wrong, then the plants tend to refuse to grow or die pretty quickly. After a couple of years without much success I think I’ve finally found the right formula to growing healthy basil.

Tips For Growing Basil

photo credit

Below is a series of tips that will hopefully help you grow basil successfully.

Tip 1: Light

In my experience basil plants tend to need light lots of indirect light. The position I have had best success with the plant at home is on a bay window sill which receives light from 3 sides yet only gets about an hour of direct sun in the morning.

Too much direct sun and I’ve found the delicate leaves easily get scorched. Ideally and East or West facing window is best. In the summer i move some of my plants out into an area in the garden that receives lots of light with dappled shade.

Tip 2: Pinching out Basil Plants

Weather you’ve grown your basil plants from seed or from taking cuttings, after a few weeks you’ll probably end up with rather spindly leggy looking plants that won’t  get you anywhere near a bowl of homemade pesto. This is where most people go wrong when growing basil. Once your basil plants reach about 15cm high pinch out the top of the plant to encourage bushier growth. Repeat every few weeks and hopefully before long you’ll have a much bushier plant that will yield many more leaves for you to harvest.

Tip 3 : Supermarket Basil

The bushy basil plants you buy in the supermarket are often tricky to look after with many people wondering how to keep them alive. They are mainly grown under artificial lights and designed to be consumed quickly rather than grown on which explains why they often die when taken home. Also if you look you’ll see they are usually several plants grown in the same pot which explains why thy are so busy.

In my opinion the best way to keep a supermarket basil plant alive is to take cuttings from it to grow more plants and use most of the plant.

Tip 4: Take Basil Cuttings

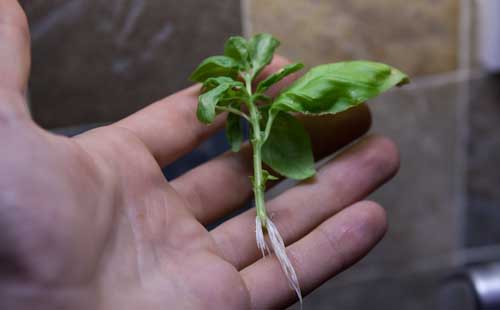
Taking cuttings from existing basil plants is pretty easy and a quick way of growing established plants. Simply snip a stem from an existing plant of about 5-15cm in length. Remove the leaves from the lower half of the stem and place in a glass of water.

Basil Cutting Sprouting Roots

Make sure the cutting is kept in lots of indirect light (see above) and hopefully after 1-2 weeks you should see some roots appearing from the end of the stem. After a further week, when the roots seem well established simply pot the plant in some regular potting compost and water regularly.

Freezing Basil Leaves

Depending on the conditions you live in you may struggle to grow your basil though the winter unless you have an indoor space that keeps fairly warm and receives lots of light. At the end of the summer, if you have a glut of basil you can easily freeze any excess by simply picking the leaves and placing in a sealed freezer bag. I simply wash the leaves after picking and dry them using a salad spinner prior to freezing.